Implant History
athenaOne for Hospitals & Health Systems
The Implant History section appears in the History section of the patient chart. You can record implant history for patients who currently have implants or had implants in the past.
Tip: You can also record implant information during implant surgery using the interoperative note.
To record a patient's implant history, you must have the Clinicals: Edit Chart permission or the Inpatient Clinicals: Edit Chart permission (for athenaOne for Hospitals & Health Systems).
If the implant device has no UDI for the implant, you can create a custom implant.
See "To record a cardiac pacer and other patient implants with no UDI."
- In the patient briefing, click the History tab
 in the patient chart.
The History tab expands. - Click the plus icon
 next to Implant History.
The implant history selector appears. - UDI — Enter the unique device identifier.

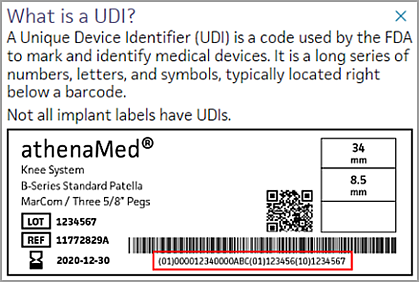
Note: Clicking What is a UDI? displays this window:
- Click Look up.
athenaOne populates these fields:- Description
- Manufacturer
- Brand name
- Version/Model number
- MRI safety information
- Contains latex
- UDI
- GMDM PT name
- Lot/Batch
- Serial number
- Expiration date
- Manufacture date
- HCT/P code
Note: The HCT/P code field won't always appear because it applies only to biologics.
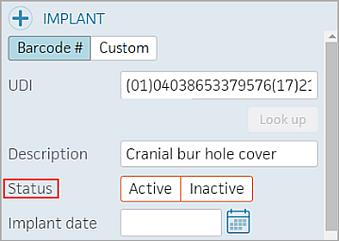
- Status — Click Active to indicate that the patient currently has the implant, or click Inactive to indicate that the patient's implant was removed.
- Implant date — Click the calendar icon
 and select the implant date.
 - Removal date — If you selected Inactive, the Removal date field appears. Click the calendar icon
 and select the removal date.
 - Click Add.
The implant history appears under Implant History on the History tab .
.
You can record cardiac pacers and other implants in the Implant history. By documenting these implants, you exclude the patient from the denominator of MIPS measures CMS144 and CMS145.
Note: If you already documented a cardiac pacer using the Description field prior to Release 18.11, you should document the implant again using the Type and Cardiac pacer fields on the updated Custom tab of the Implant History.
- In the patient briefing, click the History tab
 in the patient chart.
The History tab expands. - Click the plus icon
 next to Implant History.
The implant history selector appears.
- Click Custom.
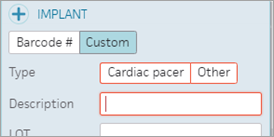
- Type — Select Cardiac pacer or Other.
- Cardiac pacer — This field appears if you selected Cardiac pacer in the Type field. Select the type of cardiac pacer from the menu:
- Cardiac pacemaker
- Intravenous cardiac pacemaker system
- Intravenous triggered cardiac pacemaker system
- Permanent cardiac pacemaker, device
- Cardiac transvenous pacemaker
- Description — Enter a description of the implant.
Note: This field is required if you selected Other in the Type field. - LOT — Enter the lot number of the implant.
- REF — Enter the version or model number of the implant.
- Expiration date — Enter the implant's expiration date.
- Side — Select the laterality of the implant (Left, Bilateral, or Right).
- Site — Enter the location of the implant in the patient's body.
- Status — Click one of the following:
- Active — To indicate that the patient currently has the implant.
- Inactive — To indicate that the patient's implant was removed.
- Implant date — Click the calendar icon
 and select the implant date.
 - Removal date — If you selected Inactive in the Status field, the Removal date field appears. Click the calendar icon
 and select the removal date.
 - Click Add.
The implant history appears under Implant History on the History tab .
.
- In the patient briefing, click the History tab
 in the patient chart.
The History tab expands. - Under Implant History, hover your cursor to the right of the implant history that you want to remove.
- Click the X icon.
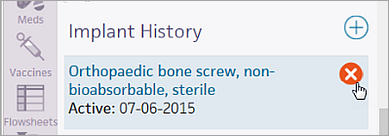
- Check the Delete (added in error) box.
- Click Remove.
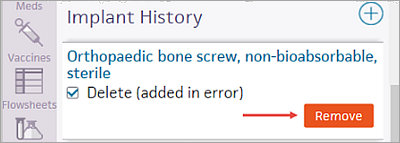
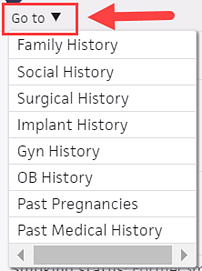
 and select Implant History.